Follow
Web Dashboard: Add Invoice Classification
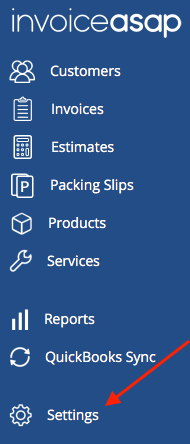
1. Click Settings.
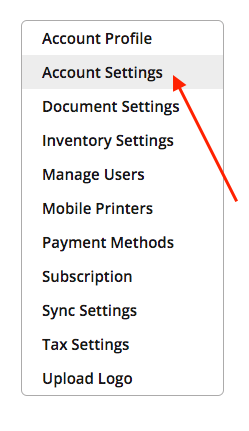
2. Click Account Settings.
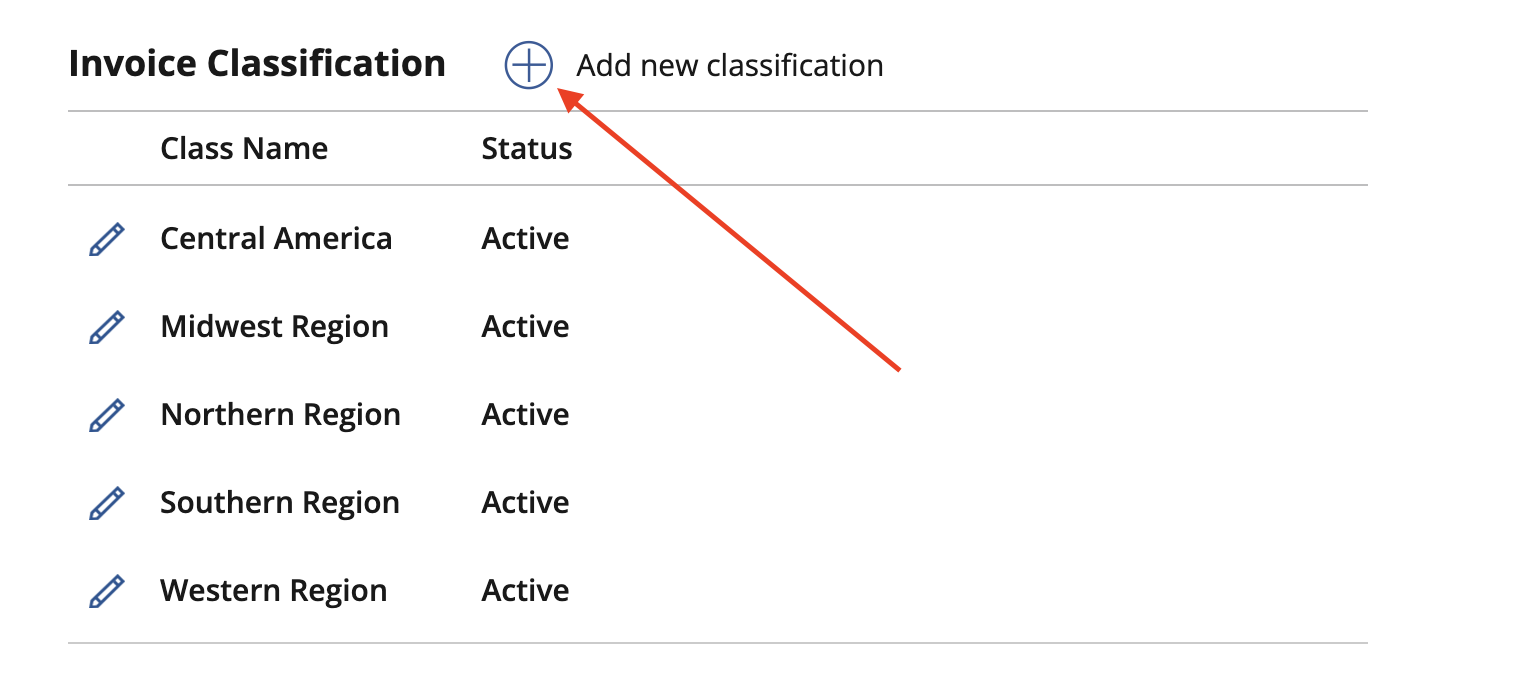
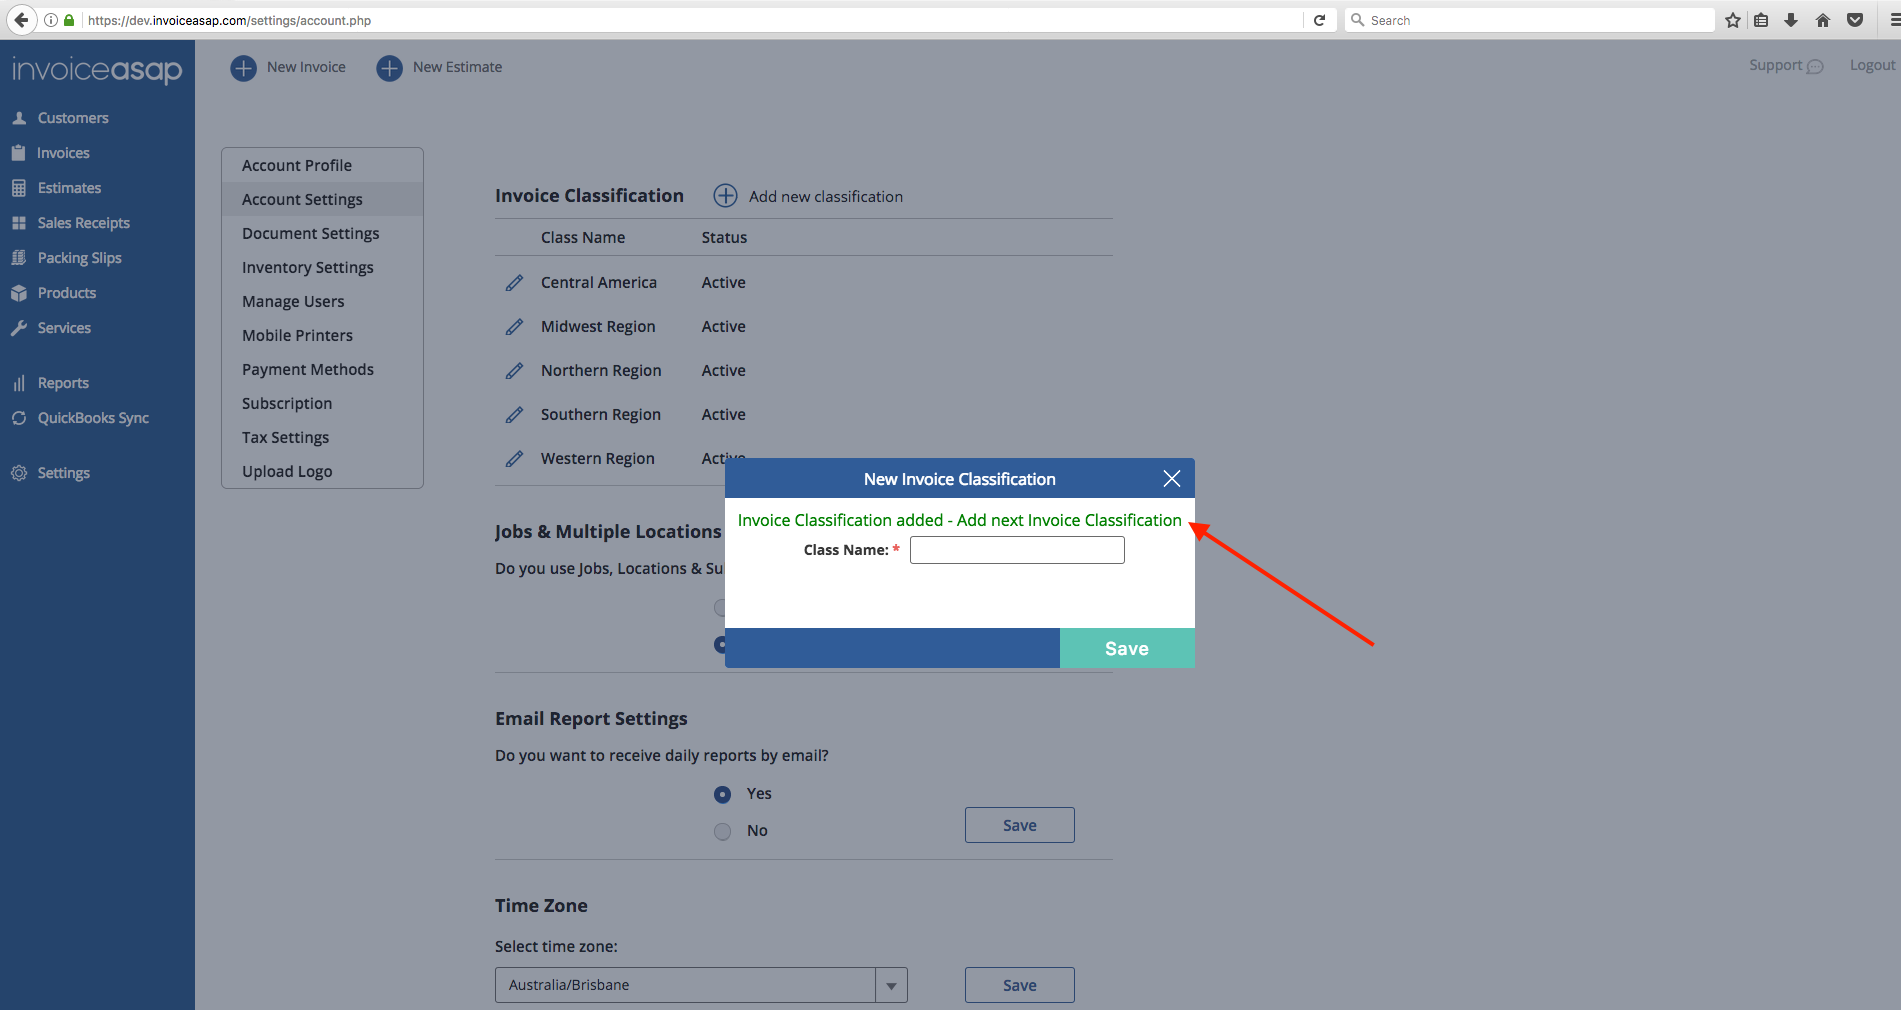
3. Click the Plus to add a classification.
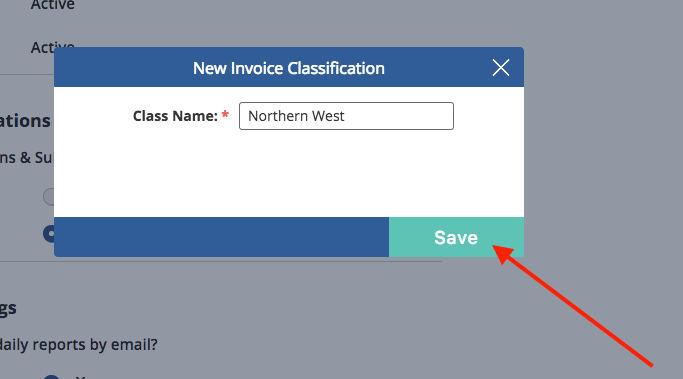
4. Add a Class Name and Save.
5. This green message means your classification was saved. You can click the "x" button to close this window.
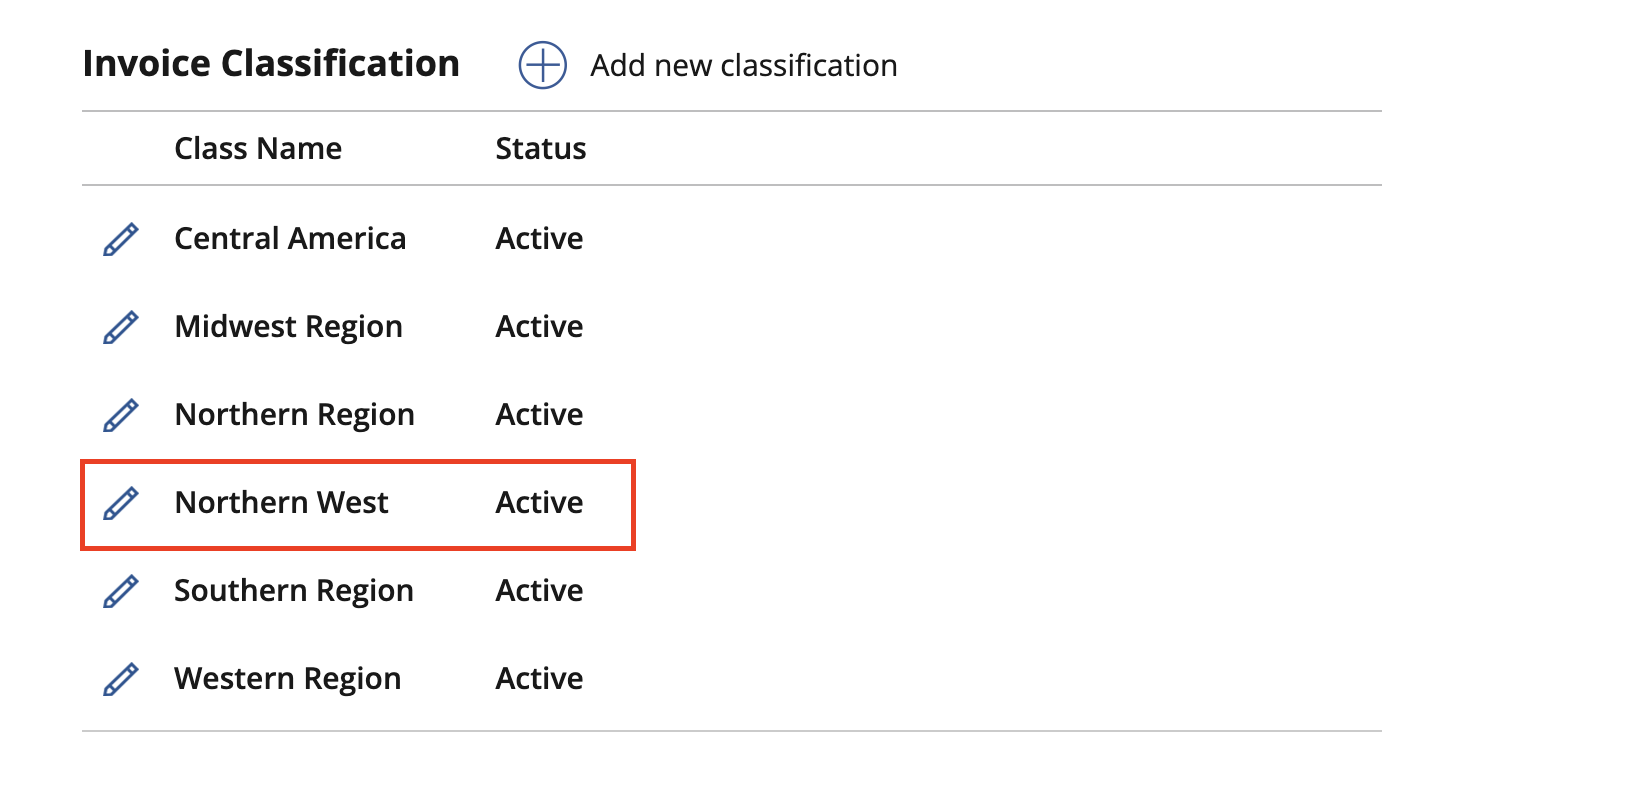
6. The class is now added to the list.
Once you have added your Classes, you can add them to invoices:
Have more questions?
Submit a request
0 Comments